For the last couple weeks in animation I have been working on a story animation. First I had to make plot line and create a character for my story. I decided to make it about a bee who runs into the window of a flower shop while trying to get to the flowers inside. Next I had to create a storyboard to show how all my shots would go together. Then I had to create sketches of my character and scan them into the computer, the image to the side is my fist sketch of my bee once I scared it into the computer. Once I had the sketches into the computer I used photoshop to make them look cleaner and to add color. Next, I create most of the elements of the backgrounds in photoshop. I made the flowers in illustrator and moved into photoshop, there is an image of the flowers to the side. Last I animated everything in After Effects using my new knowledge of arks and timing, walk cycles, multilayer, compositions, and ease in/ease out for keyframes.
Reflection
During this projects I learned how to put multiple compositions together in in after effects. I also improved my knowledge of the After Effect program in general. During this project I learned a lot about time management. Specifically how much time it takes to animate a short animation and make it run smoothly. If I redid this project I would add a body in the background of all the shots of the bees face. Also I would make the glass of the window more obvious. However, I would keep the plot line and structure of the animation the same. I will draw on my improved After Effects skills and on my new knowledge about animation time for my future projects. This project has helped me learn a lot about time management and After Effects.
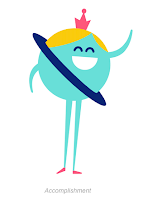
Summary The project I found is a collection of character animations, inspired by outer space, that express emotions. They were made for a google app and loop forever without any noticeable start or stop. There is an image of one of the characters but for the full post click here . Review Each character icon tells a short individual story. The icon for encouragement is two characters the sun and the earth. The sun nods and pats the earth on the head which makes it smile wider. Another small story is told in the confused icon which is a spaceship looking around. When it can't find anything it shrugs its shoulders then goes back to looking around. One element of these projects that I would apply to my own work is how the characters are constantly moving such as blinking, nodding, or bouncing which gives them a more realistic feel because people are never still. An element that I have already learned that is applied to this project is how to loop a video so it plays ...
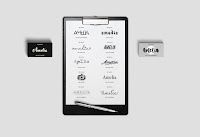
This semester I have learned a lot about graphic design. I have improved technical skills as well as my understanding of the concepts and rule of design. Name Typography The first project we did this year was a typography project where we took a characteristic of ourselves or something you liked and made your name represent that. This project lasted about three weeks. First we made a list of words or phrases that we wanted to use. Then we made three or four sketches for each. We then took the sketches into the computer and designed them. Next we critiqued our work and redesigned. During critiques I learned that I was the fonts I was using were too similar. One challenged I faced we trying to make all my designs unique and represent what I wanted without using graphics. Both the feedback and the challenges made me modify my work by removing excess graphics and finding more unique fonts. During this project I learned that typography is about putting meaning into the design of the...
Summary The plausible impossible is where an event that would be impossible in real life is made to see plausible in the animated story. Walt Disney made a documentary over this topic showing lots of examples of the plausible impossible. Here are some of them. Examples While Donald duck is eating the doorbell rings. In real life a doorbell ringing would not cause your head to shake because it is just a sound. However in the animated world this is plausible because a doorbell can surprise a person and make them jump. Also the sound of the doorbell mirror the way Donalds' head moves. When Gus Goose shakes Donald Ducks had it shakes him up and down. This is impossible because someone can not lift another person up and down just by shaking their hand, gravity won't allow it. This is made plausible by the fact that some peoples hand shakes are very hard and can make you feel like you are shaking. Also Gus Goose is winds up for the hand shake to add momentum. He is als...


Comments
Post a Comment